在windows下通过xshell来实现跳板机配置pycharm环境和xftp文件访问
date
Apr 5, 2023
slug
2023-04-05
status
Published
tags
工具
summary
type
Post
xshell实现跳板机
先使用xshell实现跳板机,并将对应的跳板机窗口打开。
跳板机使用xshell的隧道功能实现,选择作为中转的服务器B的属性。
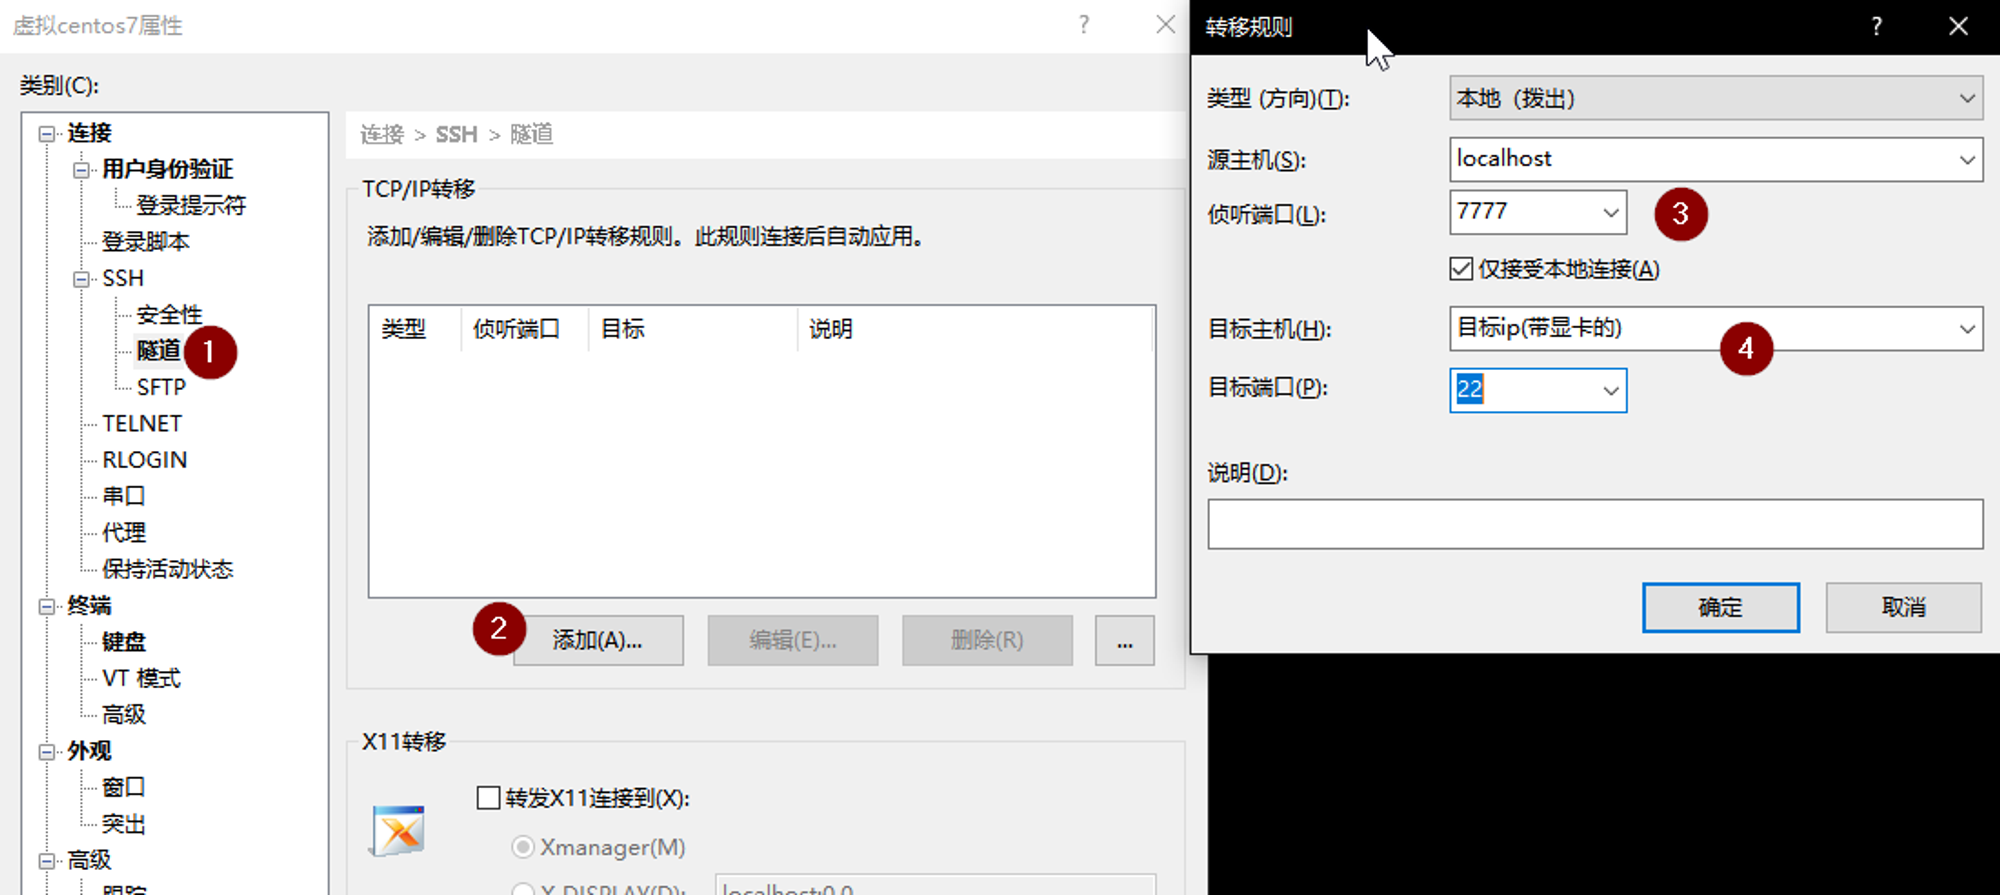
- 选择隧道
- 选择添加
- 侦听端口为本机A的,后面通过localhost:7777进行访问。这个端口可以自己设置不同的。
- 目标主机就是通过服务器B作为跳板机,要连接到服务器C的ip。目标端口是22,通过ssh进行连接。
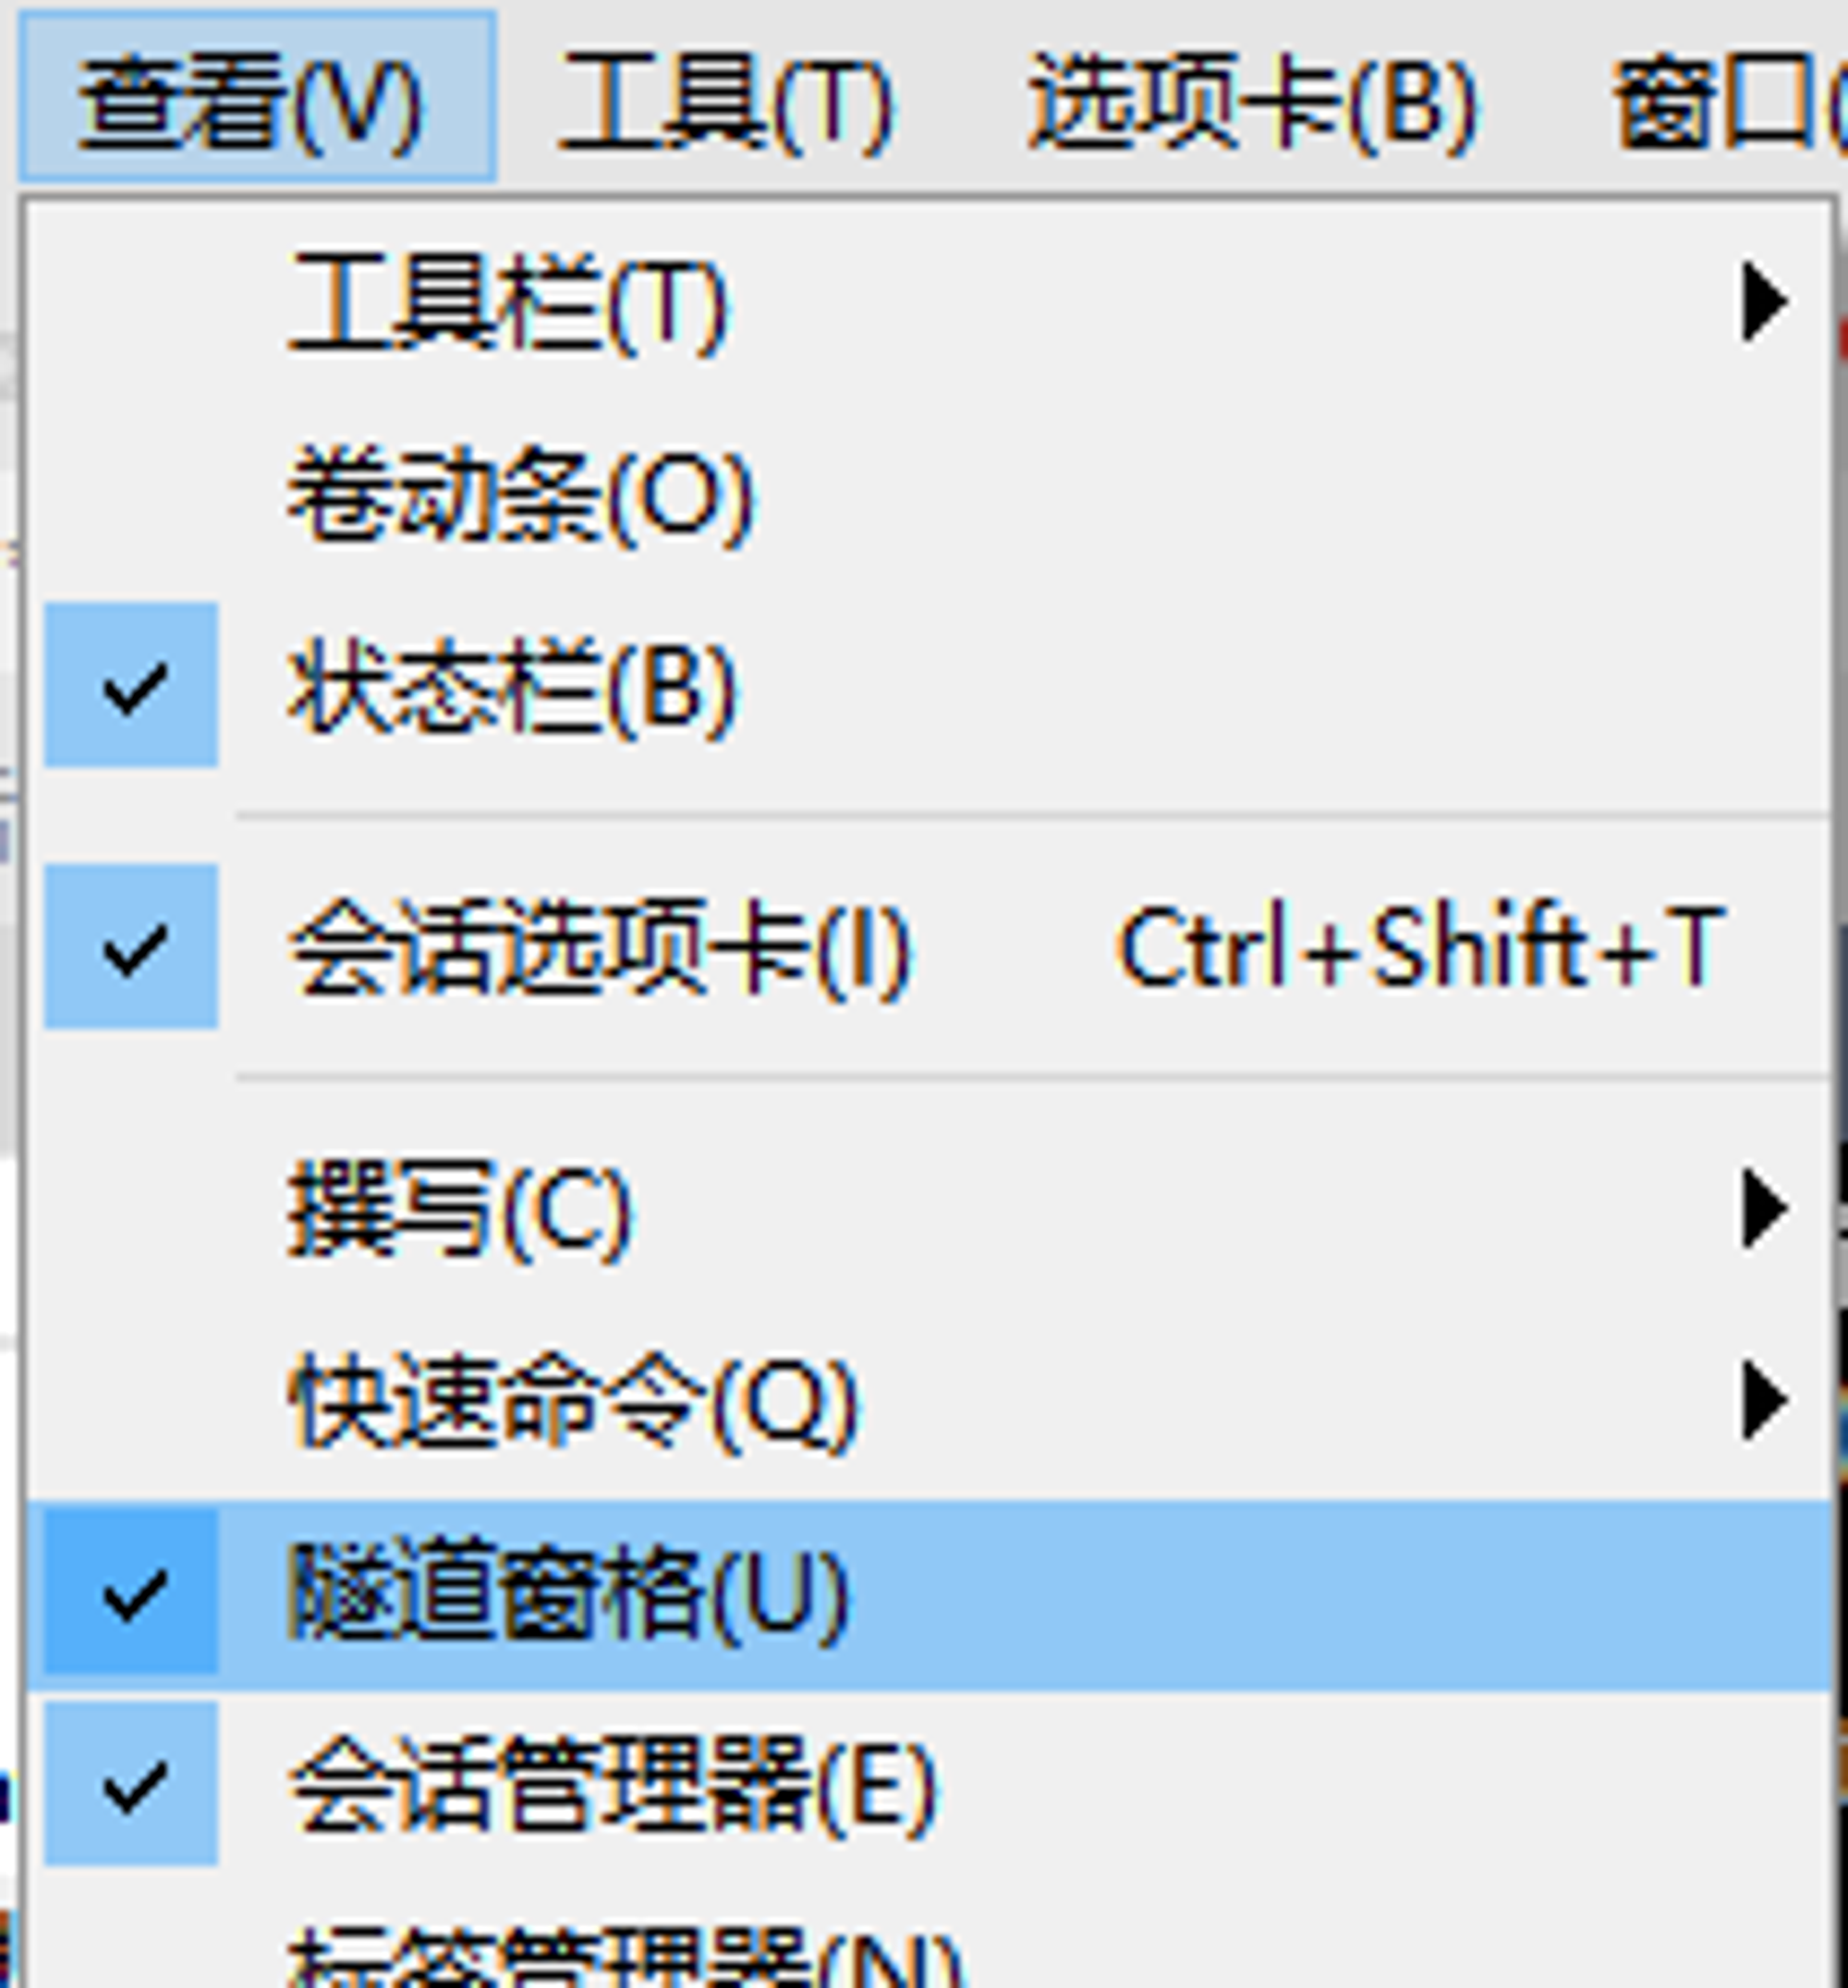
这之后隧道就可以启动了,可以通过查看里的隧道窗口来看是否成功。
pycharm配置环境
首先在setting中找到python interpreter,之后通过添加新的解释器来配置新的ssh。在下图的SSH Configurations中填入xshell隧道设置的ip和端口号。(这里不用设置要跳转到的服务器)
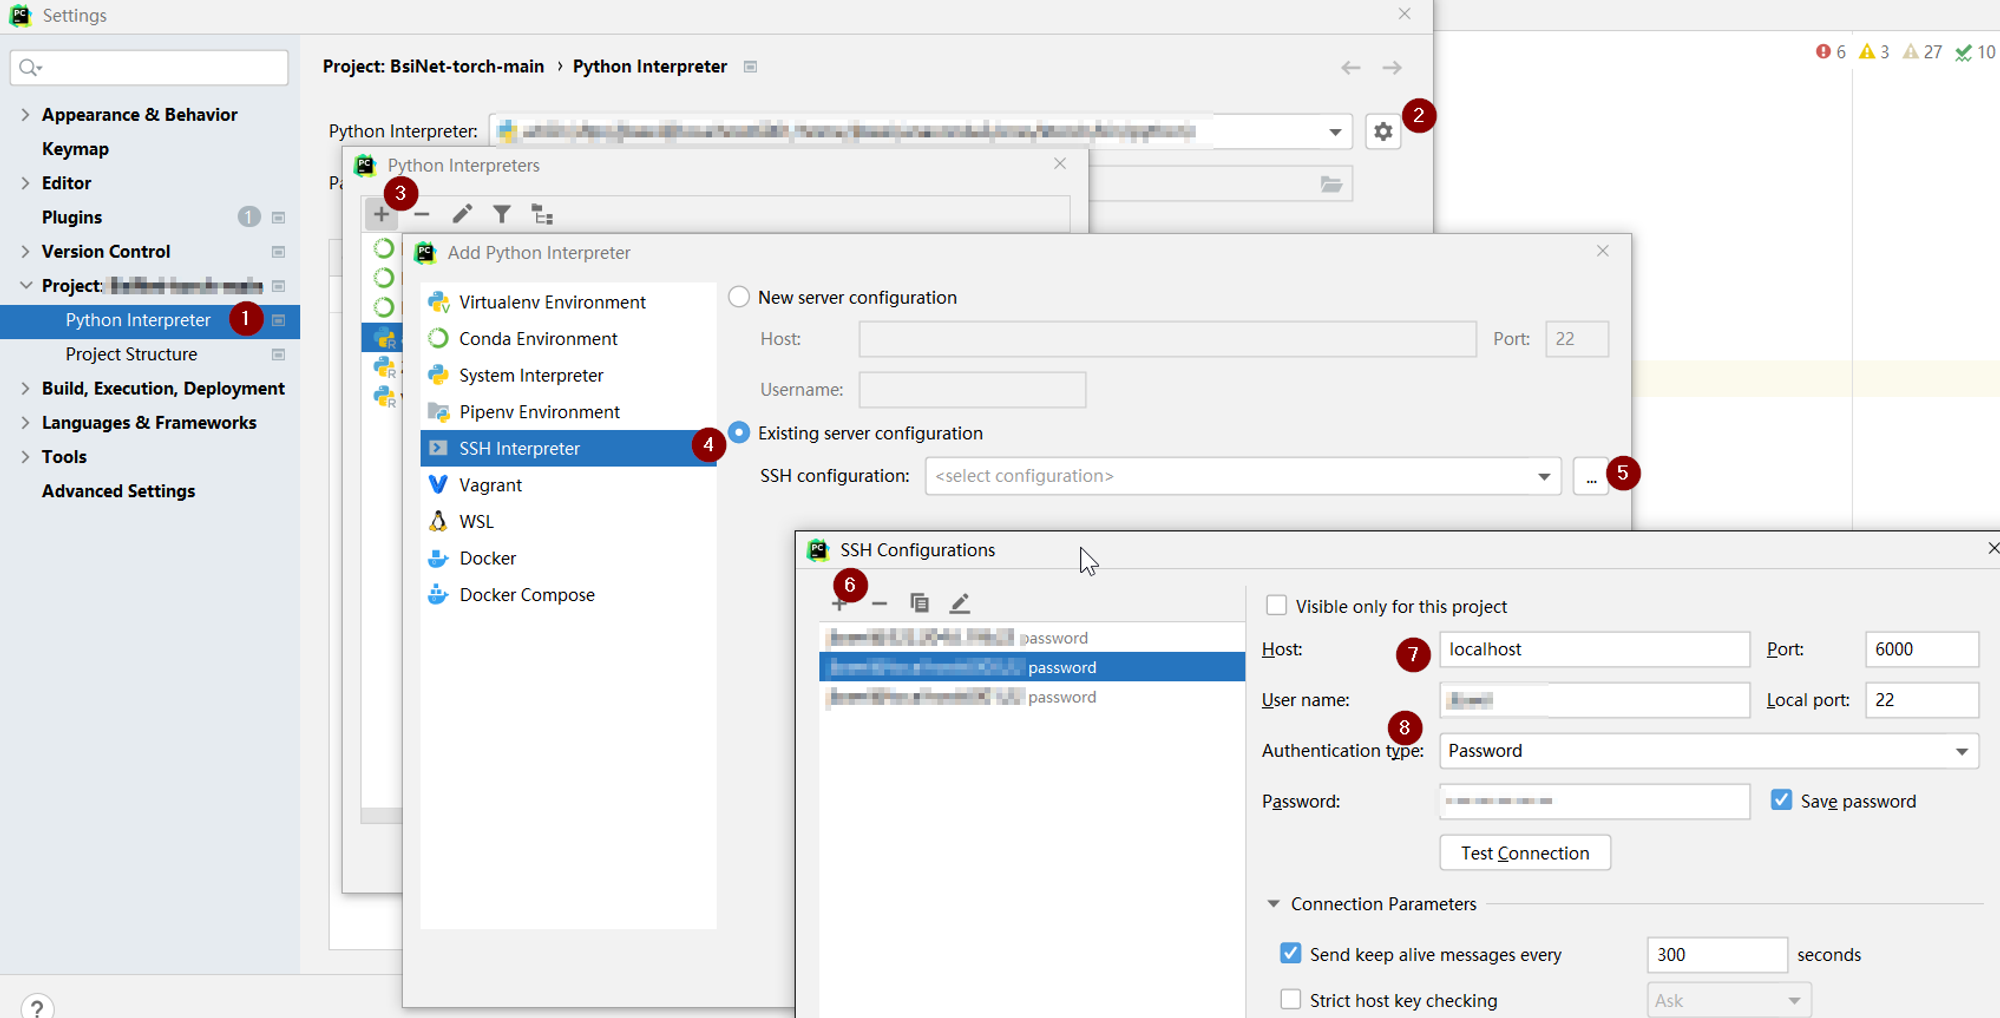
在这之后就如正常的环境添加流程一样进行设置就可以。
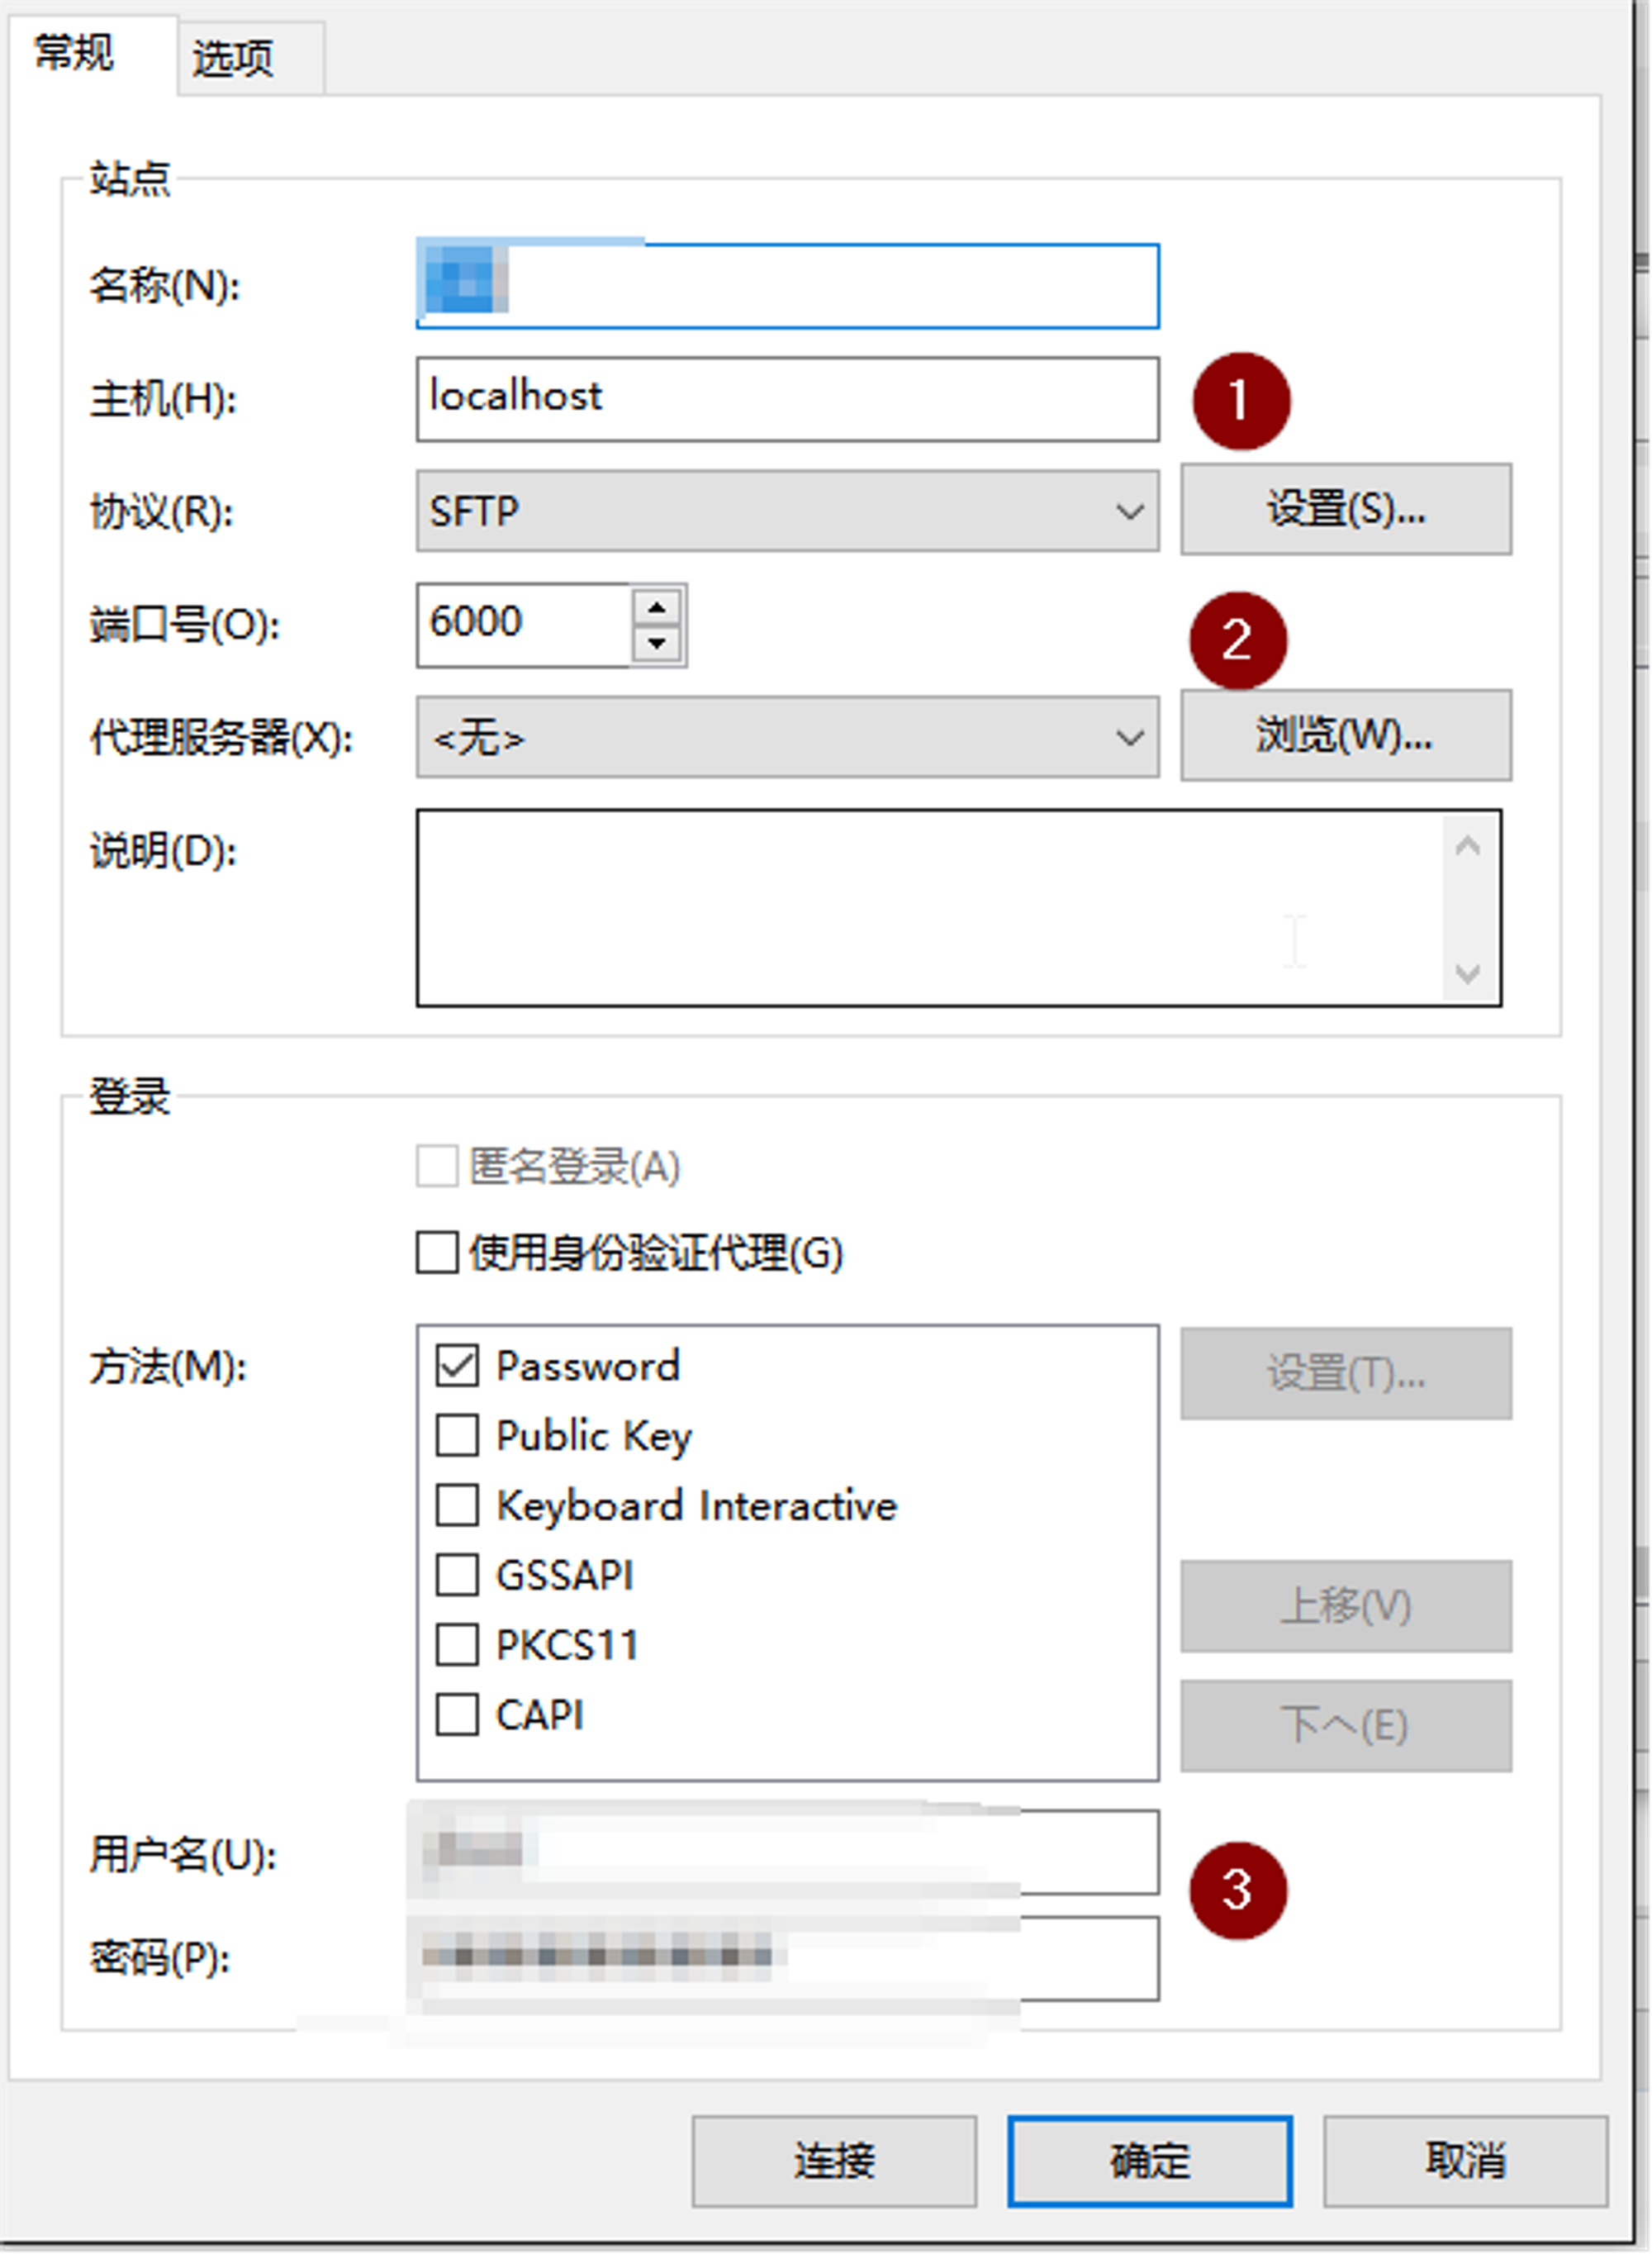
同理xftp上也可以这么配置。
xftp访问
配置如下